Showing posts with label Digital Stamps. Show all posts

Sunday, 18 April 2021

Paper Crafters Unite Against Racism


Hi Friends!
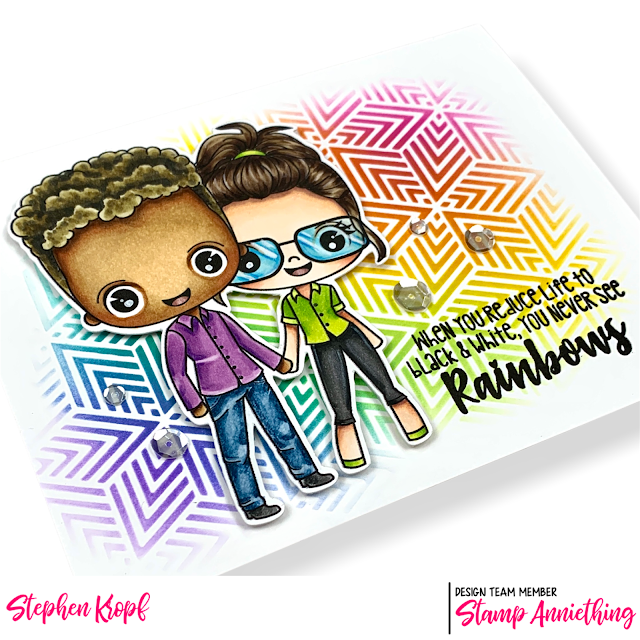
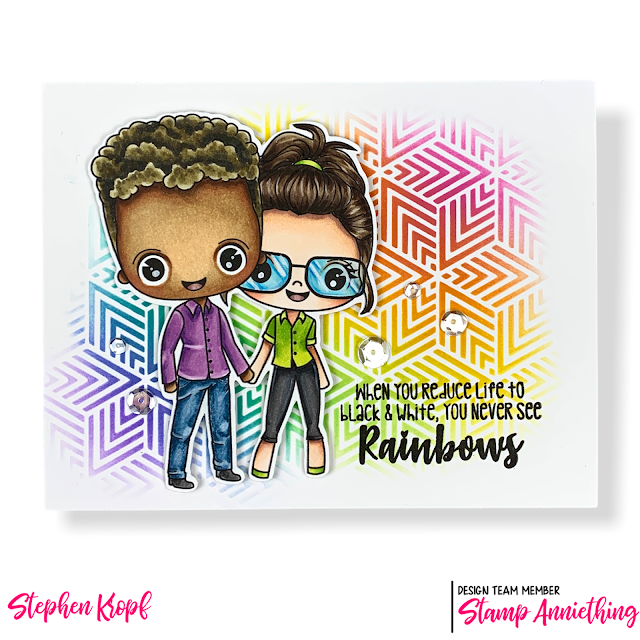
Back in January of this year, I had the honour of participating in the Paper Crafters Unite Against Racism Instagram Hop. When I heard they were doing another one, I jumped at the chance to participate.


Racism is a tricky subject to talk about but it exists and we need to change that. When I was trying to decide on what I was going to do for my project, I had a moment in my mind stick out to me. It wasn't necessarily racism just more ignorance.

Back in May of 2019 me and my partner Kevin were flown in to help out my good friend Ann (of Stamp Anniething) in her booth at an expo. I was teaching how to colour with Copics and created a project showcasing our products. It was a great day and everyone loved learning how to use Copic markers. Halfway through the day (I think this was my 7th time teaching the same class) while I was handing out the markers, a person attending the class asked if I had any more skin tones to choose from as we were only showing how to colour light skin. She said she wanted to colour her image to look like her...after hearing her say that I felt mortified that I had never thought of diversity or representation. Being gay, I know what it feels like to not be seen and it so upset me that I had done that to someone else unknowingly. I immediately told the lady we didn't have a dark skin tone but I would make one up for her then and there using the markers in her kit. I quickly figured out a dark skin combo for her and continued on with the class. When we were done, she was so over the moon with her project and thanked me for taking the time create a skin tone for her...In reality I should have been the one thanking her...she opened my eyes to something I didn't even realize I was doing and I will never do again...We all deserve to be seen and feel represented in this world. I wish I knew the name of that lady but maybe one day you will read this post and if you do...thank you! Thank you for being you and for asking to be seen...this card is for you.


Products Used:

Always follow your creative heart

Monday, 18 May 2020

Grilled To See You

Hi Friends!
I just wanted to share my card I created live in the Stamp Anniething Stampers Facebook group using the super cute "Grilled To See You" digital image 


You can currently grab this image for free ($4 at a later date) as it was part of the  "Threes a charm" event.

I coloured this image up using copic markers and added some details with coloured pencils. 

I kept my card layout very simple and used some Stamp Anniething hybrids inks and the Geo Triangle stencil 

I hope you like my card creation for today!

Until Next Time - Stephen


Wednesday, 19 October 2016


Get Your Creative Juices Blooming 


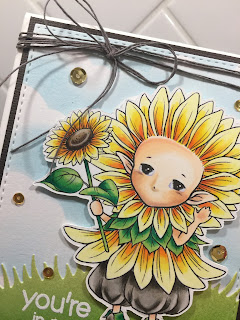
I woke up this past Monday not really feeling creative at all...I mean I would have been more then happy to loaf around in my PJ's. Yet I really wanted to colour something but I just wasn't "feeling" any of my stamps. Seriously though...how can someone such as myself who has hundreds and hundred of stamps, not find ONE...SINGLE...STAMP that I wanted to colour?! I know that sounds silly but that's how I felt. I decided to have a peak on Etsy to see if there was anything that would help get my creative juices flowing. Not only did my Etsy search help get my creative juices flowing, I discovered a digital stamp company that I had never heard of before...I found AuroraWings. As I browsed through it's huge online catalogue of digital stamps I instantly fell in love with an image titled "Sunflower Sprite". I had the card design completely finished in my head before I even clicked the purchase button.


I coloured the image with my Copic markers as well as my Winsor & Newton Brushmarkers. To accentuate the highlights, I used a white Prismacolor Premier coloured pencil. I also used my fine Micron pen to add some dotting to the centre of the small flower that this cute character is holding. I have broken down the colours I used below.

Markers Used 

Skin: 
(Copics)
BV000, R20, E53, E00, E000

Eyes:
(Copics)
B63, B60, 0

Flower Petals: 
(Winsor & Newton Brush Markers)
O177, 0567, Y657, Y367, Y828

Leaves:
(Copics)
G19, G16, YG09, YG13

Sunflower Centre
(Copics)
E49, E47, E44, E43

Pants:
(Copics)
W7, W6, W5, W3, W2

Background
To create the background, I decided I wanted to try a technique I had seen demonstrated a number of months ago by Amy Rysavy on her YouTube channel. Its very simple and quick which makes this technique even better. 
I grabbed out my "Puffy Cloud Borders" dies by Lawn Fawn and die cut out some clouds on scrap card stock (if you don't have those dies or a similar product, you can easily trim out cloud shapes to do this technique). I then used it as a mask to do some ink blending with Tumbled Glass Distress Ink onto a cut down piece of Strathmore Bristol paper. Bristol is my favourite paper to use when ink blending...I get such wonderful and easy blends, however the colours become a little more muted when compared to ink blending on regular card stock. 


I was so pleased with the finished background.

Grass
To create the ground that the cute Sunflower Sprite would stand on, I again used a cut down piece of Strathmore Bristol paper and did some simple Ink Blending with Shabby Shutters and Mowed Lawn Distress Inks. to finish it off I used the "Grassy Hillside Borders" dies from Lawn Fawn to die cut the grass. I stamped my sentiment in the bottom left hand corner using Versamark ink and heat embossed using white detail embossing powder from Ranger.


Finishing Details


I adhered the grass to my cloud background and then ran that through my die cutting machine using the largest stitched rectangle die from Simon Says Stamp. I layered some dark brown card stock behind the cloud background and adhered the card front to my card base
I used my Brother Scan N' Cut to cut out my coloured image and then popped it up on the card front using 3M foam mounting tape. To finish off the card, I tied some hemp twine from American Crafts around the top of the card and added a few sequins in Metallic Gold from Pretty Pink Posh.   


I am so pleased with how this card turned out... Especially because hours before, I wasn't feeling very creative at all. I created this card while doing a Facebook Live on my Stampin' Steve Facebook Page. If you want to watch the video, click here. I do live streams weekly on my Facebook page so be sure to check it out if you haven't already.

If you have any question or comments, please be sure to leave them below - I LOVE to hear from you!

Till next time - Stephen