Showing posts with label shaker card. Show all posts

Thursday, 3 January 2019

Stamp AnnieThing January Previews - Day 2


Welcome to the New Year!
2019 has many exciting and new things happening for Stamp Anniething!
We are so excited for this years releases, and we are
kicking it off with a GROOVY set!

Day two consists of our latest stamp, Kimmie- So Jazzed!
How totally mod and hip is she?

`~*~*~*~*~*~*~*~*~*~*~*~*~*~*~*~*~*~*~*~*~*~*~*~*~*~*~*~*~*~*~*~*~


Day 2 is here!!! 
Don't you just love Kimmie's hair in this image?! She was so fun to colour up. I coloured her using Copic markers (I will have all the markers listed below)
I created an ink blended background using my Distress Oxide Inks in the colours of Twisted Citron and Peacock Feathers. To add the texture to my ink blended background, I flicked water on my card and used the Burlap stencil from Stamp AnnieThing
Next I used the Retro Shape Shaker die that was previewed in yesterdays post to die cut out a piece of card that was ink blended on using Stamp AnnieThing Hybrid inks. I filled the shaker element with one of the groovy new sequin mixes.
The "Smile" sentiment was created by heat embossing a scrap piece of card stock using gold glitter embossing powder and then die cut using the new "Smile" die that was also previewed yesterday. 


 Have a great day!

Monday, 24 December 2018

A Warm and Toasty Hello

Hi everyone! 
It’s Stephen here with you today to share a fun shaker card design. I must admit, I love making holiday cards and I am sad that its almost over...although, who says you can't make Christmas cards all year round ;) 

I used Annie -  Warm and Toasty and coloured her up with Copic markers.
To create the shaker element, it was as easy as 1,2,3! I simply used the Shaker Basics 1 die set and the Winter Add On - Candy Cane Frame die set.
To finish off my card I did very simple ink blending to create my scene in the background and BOOM! done!
I just want to take this time to wish everyone a very happy holiday season. May 2019 be filled with nothing but good things!
Merry Christmas and Happy New Year!
Stephen

Monday, 10 December 2018

Lucille - Relax and enjoy

Hi Friends!! 
Today I have a card to share with you that I created for the new theme challenge happening over in the Stamp Anniething Stampers Facebook group. The Challenge for this month is to create a Gift Card Holder.


For my card, I coloured up "Lucille - relax & enjoy" with Copic markers. Since I was creating a gift card holder, I just had to use the new "Winter Add On - Present" die that coordinates with perfectly with "Shaker Basics - set 2" die set.
I did some simple ink blending using Stamp Anniething hybrid inks to create the background of my shaker then added some iridescent sequins. I layered it on some pattern paper and stamped the sentiment that comes with the "Lucille - relax & enjoy" stamp set.

I hope you love my card creation for today!

Until next time - Stephen

Wednesday, 7 November 2018

Stamp AnnieThing - November 2018 release Day 1


Hi and welcome to our November Release!
We have 3 new cuties for you this month! Sit back, relax and enjoy!
This release we also have some new products in our line. 
 Stencils &  Dies!
Stamp Club members get a 15% discount!


`~*~*~*~*~*~*~*~*~*~*~*~*~*~*~*~*~*~*~*~*~*~*~*~*~*~*~*~*~*~*~*~*~


 Have a great day!

Thursday, 11 October 2018

Kraftin' Kimmie Stamps October Previews - Day 1


Welcome to Day ONE of the 
October Krafty Peeks
at Kraftin' Kimmie Stamps!
I am super excited to share the card I created using the first of three fun sets that will be coming out on Saturday.

First up this week is a set of little woodland friends having fun in the winter snow! It's by artist Emilie Goulet and is called...
COOL CRITTERS!

This lovely set features two main images of a sweet mouse with a holiday lantern and a fluffy squirrel building a friend!!!!! Aren't they cute? Plus there are four sweet sentiments!


I decided to create a bright and cheery shaker card, allowing my colouring to take centre stage.

You will see these new images in action as you hop around the Krafty blogs! You'll see the list of Krafty design team members and Krafty Guests below and be sure to leave some love at each stop because one lucky commenter is going to WIN a gift voucher to the krafty shop!!
Plus we're doing a GIVEAWAY of the ENTIRE October release on the Krafty Friends facebook page! 
Be sure to join us at the LIVE Online Release Party on Saturday afternoon at 1pm EST! We'll be checking out all THREE of the new clear stamp sets, sharing fabulous creations, giving away prizes and having tons of krafty fun! 
Happy hoppin'!

Wednesday, 5 September 2018

Stamp AnnieThing September Release Sneak Peeks - Day 1


Hi and welcome to our September Release!
Its time to enjoy that crisp FALL AIR!!
This release we also have some new products in our line. 
 Stencils &  Dies!
Stamp Club members get a 15% discount!


`~*~*~*~*~*~*~*~*~*~*~*~*~*~*~*~*~*~*~*~*~*~*~*~*~*~*~*~*~*~*~*~*~


I created a shaker card using all of the elements from todays sneak peeks. All the stencils add such amazing texture and I love the Give Thanks die...the leaves alone in the die set are a must have and can be used on many occasions.


 Have a great day!

Monday, 20 August 2018

Stamp AnnieThing - You're an A+ In My Book

Hi Friends! Im popping in today with another card creation for Stamp AnnieThing!


I created the perfect card for any book lover in your life...its a clean and simple shaker card that you can whip up super quick.

I kept my card base white, die cut out a circle window and then stamped the sentiment to follow the curve of the circle. I ink blended the area behind the window with some purple Distress Ink and filled the opening with a fun shaker mix. I used Abigail - AIn My Book and coloured her with Copic markers. To finish off my card, I added a few of the matching sequins from the shaker mix around the card front to tie it all together.

I hope you liked my card creation for this week! 

Until next time - Stephen 


Wednesday, 30 May 2018

Kraftin' Kimmie Stamps - Inspiration Wednesday

Hi Friends! Its Inspirational Wednesday over at Kraftin' Kimmie Stamps!


I absolutely love the Monkey Business stamp set..I honestly had a smile on my face the entire time I was colour this super cute image. I decided to create a shaker card and used the bananas from the stamp set as added shaker elements inside the shaker window.
I colouring up the monkey using the following Copic markers

Copics:
Monkey - E29, E27, E23, 
Tongue - E04, R20
Suit - YR09, YR04, Y17, YG09, YG05, YG01
Teeth - C2, 0
Banana - Y17, YR23, YR20, E23

I will be colouring up images from this stamp set LIVE tonight at 7:00pm EST in the Kraftin’ Kimmie Krafty Friends Facebook group. Hope to see you there! OH! and if you really like this stamp set, it is only sale temporarily :)


Until next time - Stephen 

Monday, 30 April 2018

Steampunk Maggie


Hi friends! Its my day to share a card creation on the Stamp AnnieThing blog
I am sharing a card that has been sitting in the back of my head for about 6 months now. Back in November, I ate at a restaurant called Toothsome Chocolate Emporium...its a really cool steampunk styled restaurant with amazing food (AND desserts!!) at Universal City Walk in Orlando, Florida. 
Inside of Toothsome Emporium - my inspiration photo of my card creation.

I immediately thought the Maggie -  Steampunk stamp set would be perfect to create a card with a design inspired by the restaurant. 


I created a shaker card filled with gold coloured balls and crystals. I also used Nuvo Mousse to add accents of golds and bronze onto of the embossed black cardstock. To finish off the caed, I added some black and white striped paper. Lastly, I heat embossed the sentiment using a bronze embossing powder to tie everything together...and of course I added a few sequins because it wouldn't be a card of mine without sequin.

I hope you like my card creation!
Until next time - Stephen

Monday, 19 March 2018

Stamp AnnieThing - Happy Birthday To You

Hi Friends!
Its my day to post on the Stamp AnnieThing blog and today I created a simple shaker card featuring the super cute Abigail - Glad We're Friends stamp set.


I created this card live on my Stampin' Steve facebook page. I had a a lot of fun making this card with everyone.

I coloured here using the following Copic markers

Copics
Hair - E55, E53, E51
Skin - E04, E11, E21, E00, E50, R20
Shirt - G19, YG09, YG05
Skirt - YR18, YR07, YR04

Lastly, I pulled the Happy Birthday sentiment James - Happy Birthday To You and white heat embossed it on some black card stock.

I hope you like my card creation for today! 

Until next time - Stephen 

Wednesday, 7 February 2018

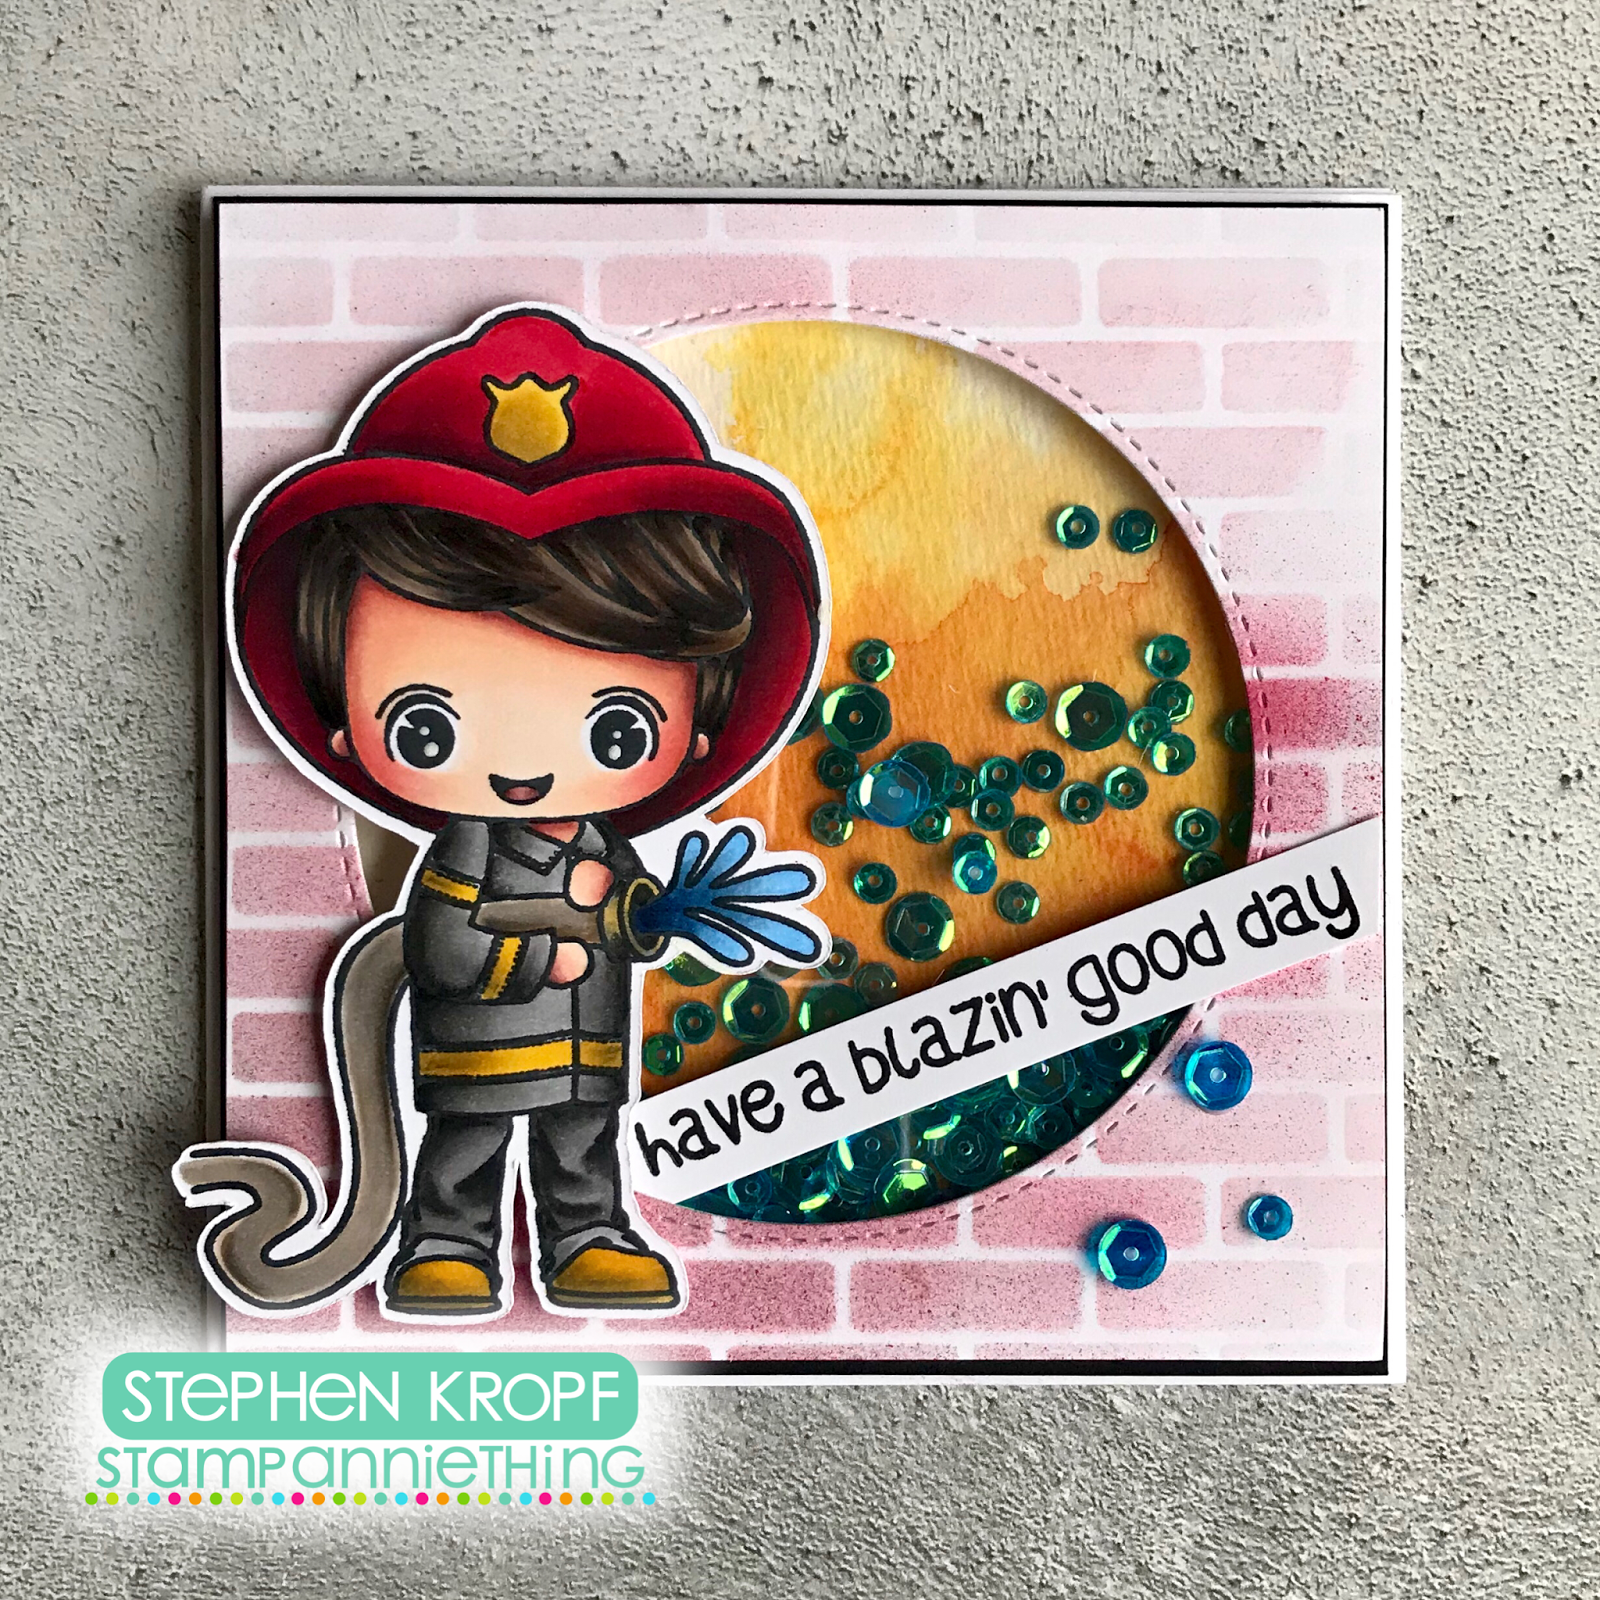
Stamp AnnieThing February Release - Day 1


Hi and welcome to our February Release!
This release is based on some community service careers!


Kevin will be available in the store Friday along with the other 2 stamps we showed you  this week!!
`~*~*~*~*~*~*~*~*~*~*~*~*~*~*~*~*~*~*~*~*~*~*~*~*~*~*~*~*~*~


I created a square shaker card with a watercolour background. To create the brick background, I used my Copic airbrush system and airbrushed overtop of a stencil with a brick pattern. I stamped Kevin with Memento Tuxedo Black ink and coloured him with the following markers:

Copics:
Skin - E04, E11, E21, E00, E50, R20
Hair - E49, E47, E44, E42
Helmet - R59, R37, R35, Y28, Y26, Y15
Suit - T8, T6, T4, T2, Y28, Y26, Y15
Hose - E43, T6, T4
Water - B39, B37, B34, B32

I hope you enjoyed our Sneek Peek for the release!

 Have a great day!

Friday, 5 January 2018

Bellariffic Friday - Winter Backdrop Challenge


Hello Friends!
Its the first Bellariffic Friday of 2018!  Emily from Stamping Bella has given us some really fun challenges this month and I'm so excited to participate in them...be sure to play along in the Stamping Bella Sistahood! Facebook group
This weeks challenge is to create a card using the Winter Backdrop stamp set. This stamp set is 25% off for the entire month of January...be sure to snap it up if you can


I created a fairly simple shaker card that frames a small section of the Winter Backdrop stamp set. I chose to focus my attention on colouring a small area of the image with my Copic markers and use details like my diecuts and embellishments to help bring the scene to life.

What do you think? 

Until next time - Stephen 

Thursday, 3 August 2017

Stamp AnnieThing August Release: Day Two - Sam Game On!


Hi and welcome to Day #2 of 
Stamp Anniething's August Release!
This release is ALL ABOUT THE BOYS!!
Remember Sam? He's back and getting his game on!


Sam will be available in the store Friday along with the other 2 stamps we show you  this week!!
~*~*~*~*~*~*~*~*~*~*~*~*~*~*~*~*~*~*~*~*~*~*~*~*~*~*~*~*~*~*~*~*~

I love creating shaker cards and I thought it would be fun to make a shaker card using Sam - Game On!


I had lots of fun playing around with pattern papers to create this bright and playful card. I feel like this card could be used for any occasion, Congratulations - Birthdays...you name it!


I coloured Sam using the following Copics and cut him out using my Scan N' Cut

Copics:
Skin - E79, E77, E74, E71, E70, E93
Hair - T9, T7, T6, T5, T4, T2
Pants - B99, B97, B95, B93, B91
Shirt - YR18, YR16, YR15
Shoes - YG07, YG05, YG01
Game Controller - T5, T4, T3, T2


I hope you enjoyed our September release!

 Have a great day!

Monday, 24 July 2017

Wedding card featuring Stamp AnnieThing stamps

It's my turn to share over on the Stamp Anniething Blog today!
I've made a sweet Wedding card with a shaker element featuring two stamps from the May Stamp AnnieThing Release - Eloise Congratulations and Tommy Way to Go 
I kept my colour pallet and card design more simple to allow the focus to remain on Eloise and Tommy.
I started with a A2 sized card front and adhered a diagonal stripped pattern paper to the left hand side. I then Die cut out the window using the Stitched Dome Frames from MFT. I used the same die and cut out another frame but this time out a white glitter paper. I adhered a piece of clear acetate on the backside of the card front and then glued the glitter frame I cut out on the front. I popped my card front up with a double layer of foam tape onto another piece of card stock that I ink blended some Victorian Velvet Distress Ink on. I filled the card with a bunch of coordinating sequins, prills, and beads. 
I coloured Eloise and Tommy with my Copic markers and then adhered them to my card front. I stamped the sentiment that came with Eloise on a a thin piece of paper that I cut into a banner shape. To finish off my card, I added some Nuvo drops around then sentient in the colour Silver Linings. 

I hope you like my card creation!


Until Next Time - Stephen